 The most confusing settings in Nikon 3200
The most confusing settings in Nikon 3200
The most confusing settings in Nikon 3200
The Nikon D3200 (and many other past and present Nikon DSLRs) has a number of settings that are useful, but are a bit confusing, and there will be unpleasant consequences if you change these settings and forget to reset them later.
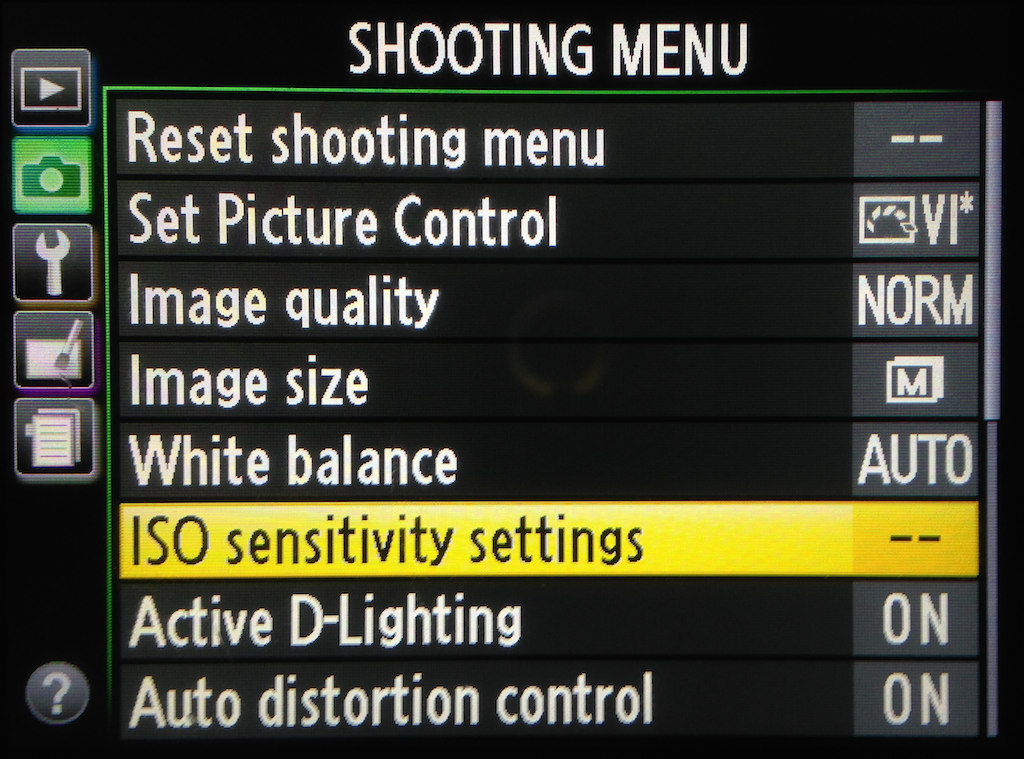
Of course, ISO is always automatic in "Auto" and scene modes. But D3200 also has an Auto ISO mode to be used along with MASP modes, also called "manual" modes.
Auto ISO allows you to set ISO indirectly in terms of constraints, instead of an absolute ISO value. For example, you can specify that minimum shutter speed is 1/60s and maximum acceptable ISO is 800. The camera will try to use the lowest ISO that fulfills these limits.
Then you can shoot hand-held in e.g. aperture-priority mode, just choosing the aperture, while both shutter and ISO are selected automatically to get the best picture. Without this feature, you would have to keep an eye on shutter speed, and raise the ISO if the shutter is too slow.
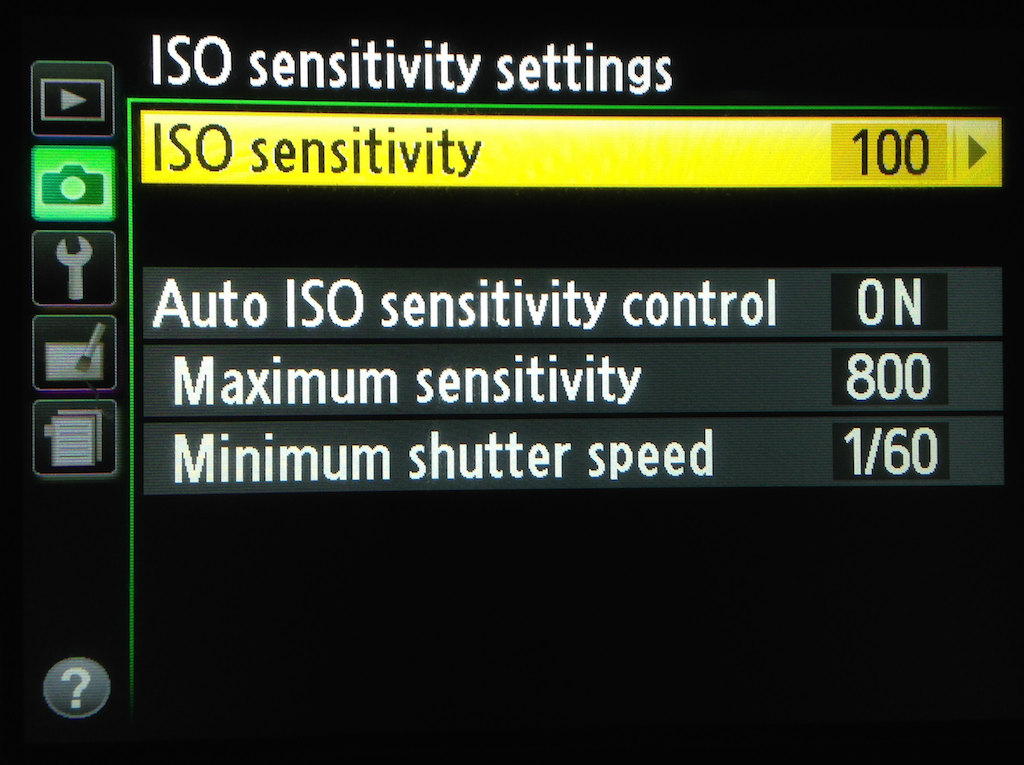
Even when Auto ISO is ON, you can still select your base ISO manually, either in the menu or using the Fn button. The camera first tries to use the base ISO; it increases ISO only when necessary.
This is important because, if you forget your ISO base configuration at 800, all shots will be made with ISO 800, even if ISO 100 would be ok. Most probably you will want to set the base ISO to 100 when using Auto ISO, so the camera can use the lowest allowable ISO for the best picture quality.
Configuring ISO manually can still be useful: when Auto ISO needs to work, the ISO-A label blinks on Info screen and ISO AUTO blinks on viewfinder. So you know that ISO was raised. If you have a good guess of the ISO for the current lighting, and you want to be warned if your guess was too low, just set it manually.
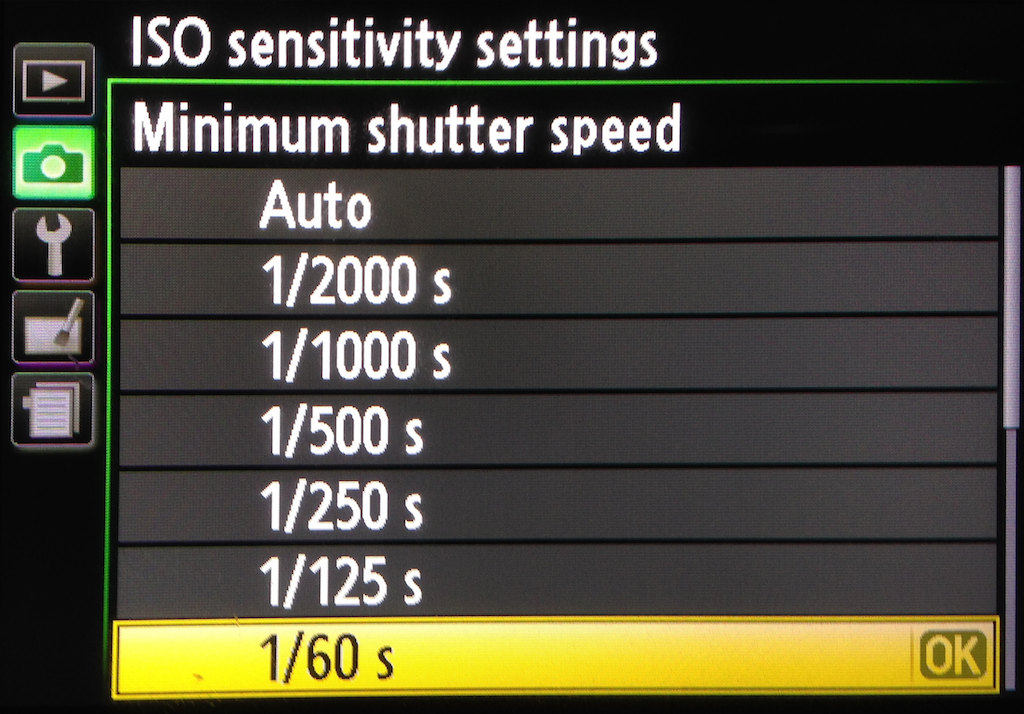
The D3200 can select the minimum shutter speed automatically based on lens (the Auto item at the top of minimum shutter speed list). But this feature, as it is, is useless because it selects an "average" minimum speed that cannot be tweaked. For example, I'd need the auto speed to be one stop faster, because my hands shake quite a bit (too much coffee, perhaps?).
Also, the D3200 does not change the speed for a zoom lens accordingly to focal distance, and does not take into consideration if Vibration Reduction is enabled or not. For zooms like the 18-140mm DX VR, the acceptable shutter speed is fixed at 1/60s, but it should go from 1/4s to 1/300s.
So, in D3200, stick with an absolute value for minimum shutter speed that is appropriate for the longest focal length of the zoom and the VR switch position (probably ON). Make tests to determine the speed you need for sharp pictures (each hand shakes differently and interacts differently with the VR system). For fixed lens without VR, things are simpler: a single absolute speed is fine.
Remember to change the minimum speed every time you change the lens.

If Auto ISO cannot calculate a good exposure, it respects the maximum ISO you configured, but resorts to slower shutter speeds. It does not lock the shutter. So, the shutter speed still needs to be checked if the lighting is extremely low, or if the maximum ISO is too low.
One big gotcha: in Auto ISO, flash pictures may and will use high ISO values. This is the most counter-intuitive part. If you forget Auto ISO configured at 6400 or Hi-1 and use the flash, your shots will be very grainy, perhaps unusable.
Most people would assume that lowest possible ISO would be employed with flash, but it seems that Nikon changed the flash programming to save power, as well as to capture more natural light. But I didn't like the results at all.
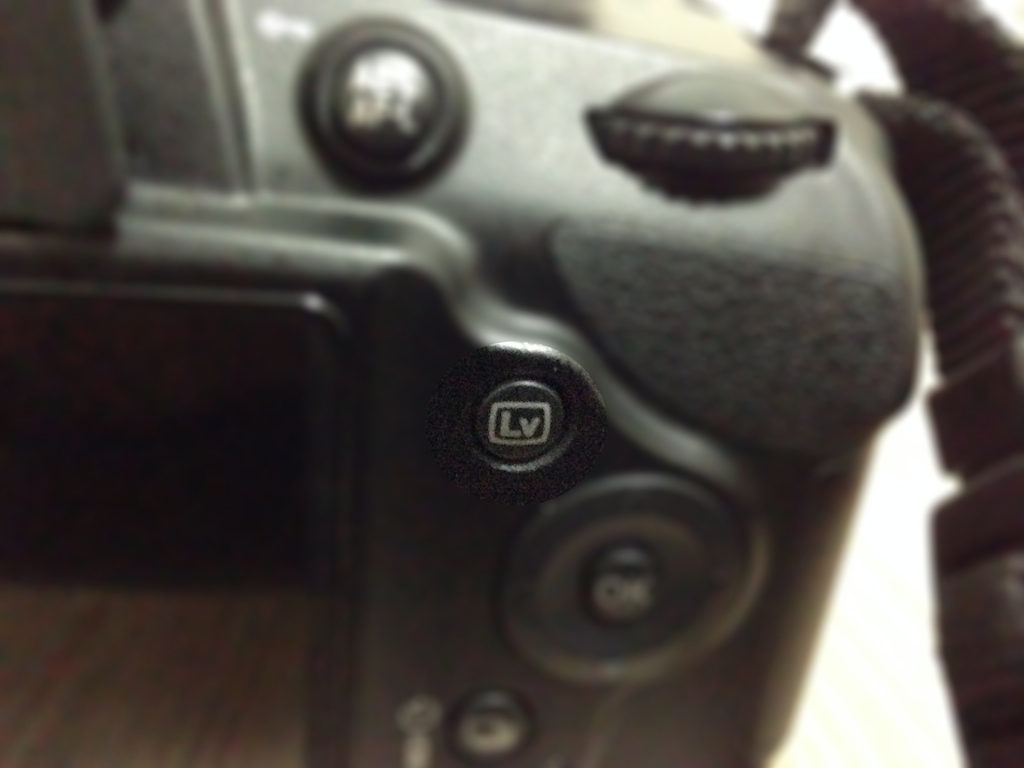
The Live button transforms your DSLR in a poor man's mirrorless, complete with the dreaded contrast detection autofocus. In D3200, you need to enter Live View to be able to record a movie.
The gotcha with Live View, at least in D3x00 models, is that aperture cannot be changed while in Live View and movie recording.
It seems that, in some cameras, the mirror-lift mechanism is coupled to the aperture-setting lever, and they can only move together.
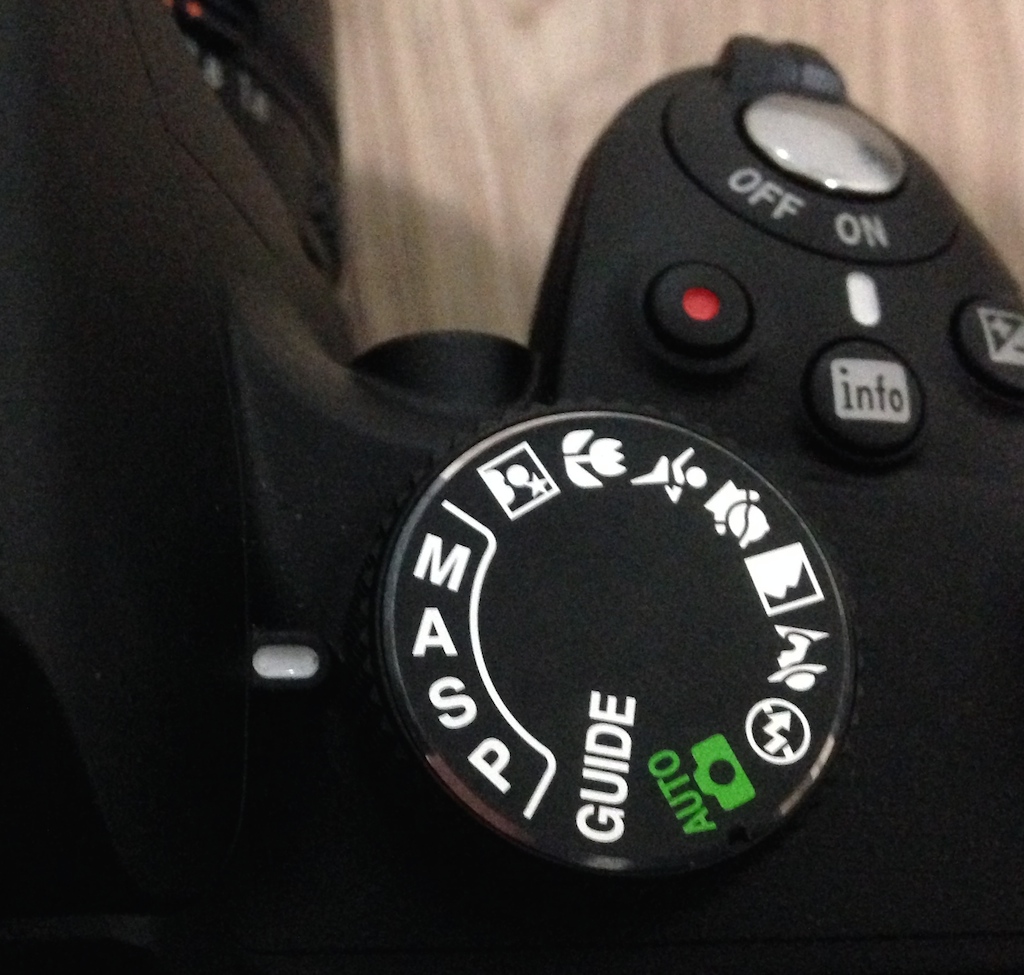
If you are using an auto/scene mode and go to Live View, the aperture is automatically set to God-knows-what. I suppose that Auto mode selects the sharpest aperture for the attached lens. If you are in a manual (MASP) mode, at least you will know which aperture is set when Live View is activated.
One interesting side-effect of Live View is previewing the depth-of-field for the current aperture. Basic models like D3200 do not have depth-of-field preview for the viewfinder, but you get this for free in Live View.
The inflexible aperture is not so important for shots, because the camera will release the mirror and lift it again when you take a shot in Live View, so the aperture can be reset to another value. It may be a problem for movies, because the mirror does not move and the aperture is unchanged, even if you "changed" it in the dial.
This is related to the last item since Live View and movie recording are intertwined. Nikon D3200 allows you to control shutter and ISO manually while recording a movie.
In a sense, aperture control is always manual for movies, since the aperture set when entering Live View will be kept during movie recording. Of course, if the mode dial is in AUTO, you won't know which aperture is set when Live View is enabled, but the act of recording a movie won't change the aperture.
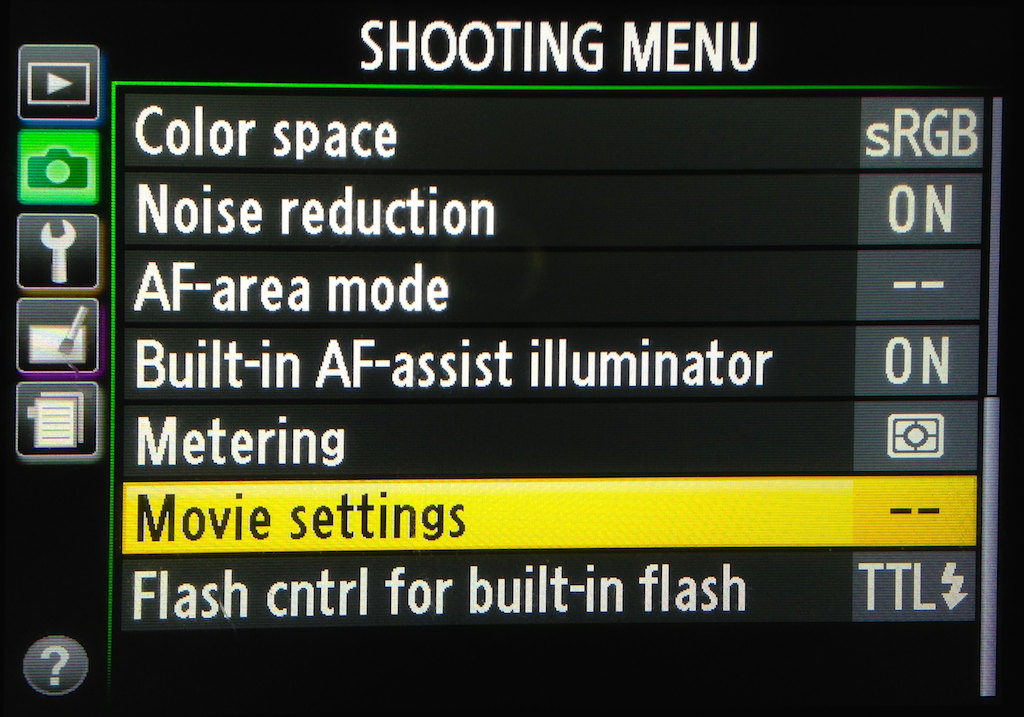
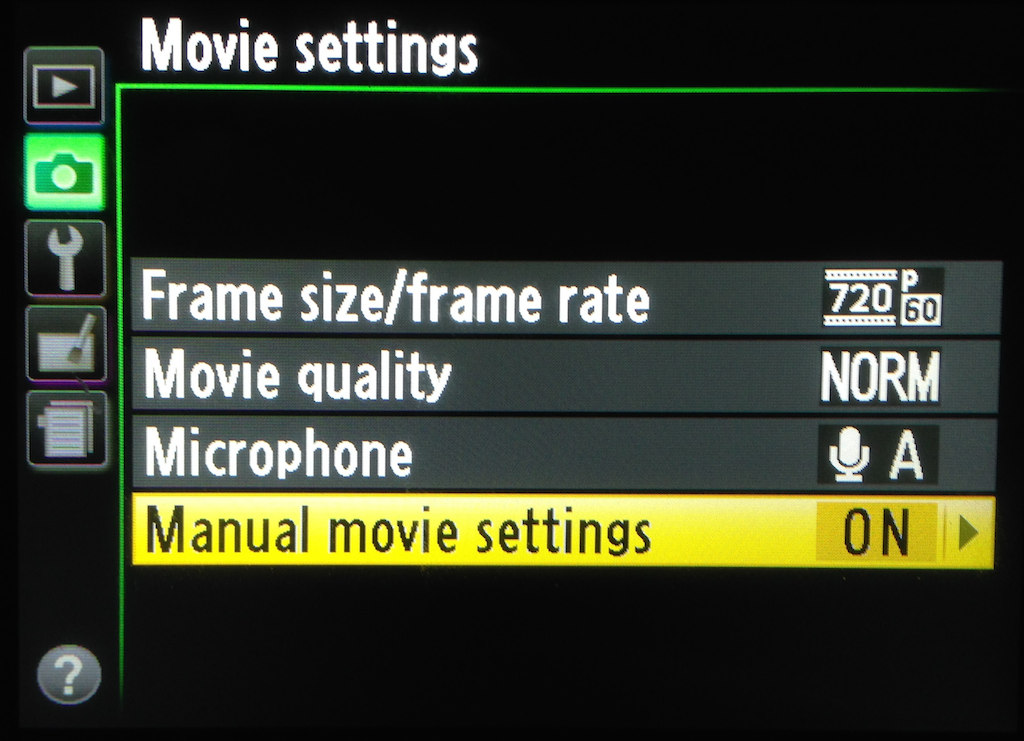
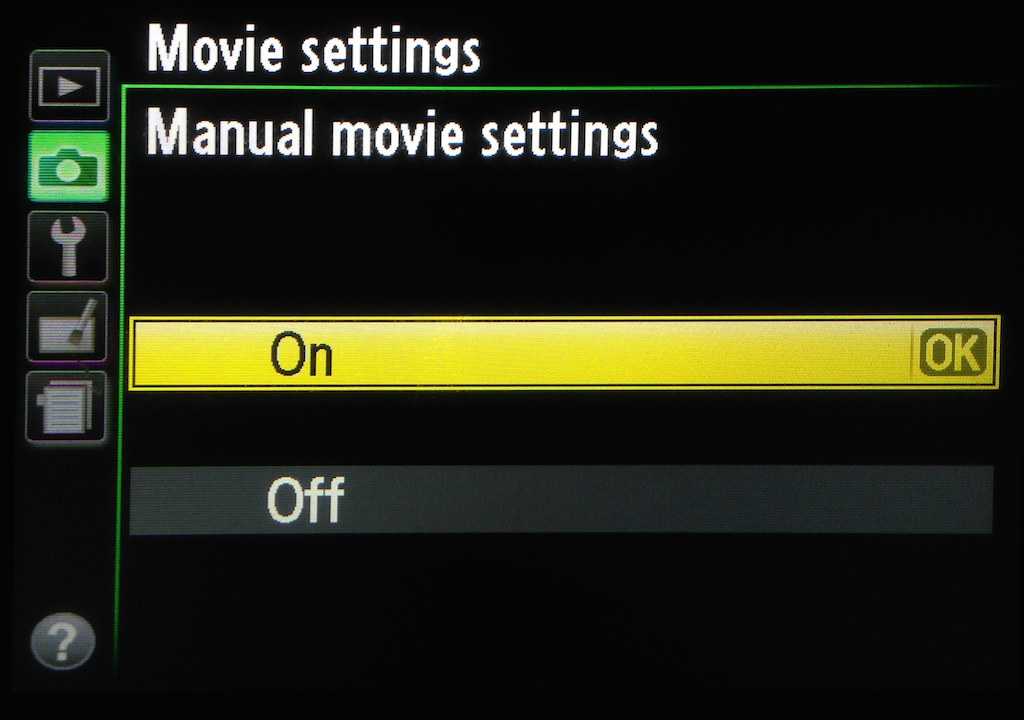
The manual movie settings need to be enabled via a menu (Figures 7, 8 and 9). In addition, they are only effective when mode dial is in M (fully Manual). Kind of a double-lock.
In any other mode of the dial, the camera stills control ISO and shutter automatically for movies, and Auto ISO has no effect in this — you can't set the maximum ISO for a movie, for example.
Fully automatic movie recording works well for most uses, but manual control can be useful sometimes.
For example, most cameras react in a strange way when lighting changes. Imagine a night scene, then a car passes by with bright headlights. Most cameras will decrease exposure with a delay, only to increase it with another delay when car is gone. In manual mode the exposure is steady, letting the car headlights blow up a little, like in cinema.
Manual mode is the only way to avoid high ISOs in movies, at least in the D3200. A lower ISO can avoid that grainy, noisy movies typical of camcorders at night.
The manual shutter can be useful to avoid flicker (though the automatic flicker control of D3200 takes care of that in automatic mode). For movies, the minimum shutter speed depends on movie settings. For example, 30fps (NTSC mode) means a minimum shutter speed of 1/30s. You will need a slower shutter to compensate a lower ISO, but this may be a blessing in disguise: a slower shutter will make your movie look better.
Manual movie settings are a loophole to measure exposure when older lenses without electronic contacts are mounted on your camera. Set the aperture, go to Live View in M mode and then you can set ISO and shutter (within limits) until the image looks good on the LCD. It is a rough measure, but certainly better than nothing.